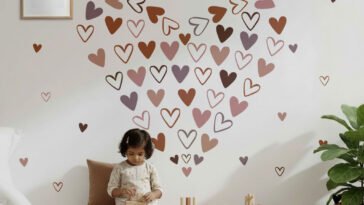
If you’ve ever dreamed of giving your space a quick makeover without breaking the bank or calling in an expert — we’ve got you! 

StickMe wall stickers make it easy, fun, and super satisfying to decorate your walls all by yourself.
Whether it’s your living room, kid’s study corner, or office workspace, our stickers add personality and warmth in minutes. Ready to begin? Let’s walk through how you can do it yourself — like a pro!
 Step 1: Clean the Surface
 Step 1: Clean the Surface
- Start with a clean, smooth wall.
- Wipe the area with a dry, lint-free cloth to remove dust or moisture.
Pro tip: Avoid oily or damp surfaces for the best results — stickers love clean, dry walls!
(StickMe DIY General Instruction & Assembling Video- Click here)
Step 2: Plan and Measure
 Step 2: Plan and Measure
- Before peeling, take a minute to plan.
- Mark the area where you want the sticker to go — this ensures perfect alignment.
If it’s a large sticker, get a helping hand — two people make application easier and faster.
Step 3: Peel Carefully
 Step 3: Peel Carefully
- Begin peeling from the larger cut side.
- Handle the stickers gently to avoid stretching or folding.
Step 4: Assemble with Care
- Some of our designs come in smaller pieces (like a fun puzzle ).
- Each piece is pre-cut and coded — just follow the numbers or color guides to match and assemble the full design.
 ).
).(StickMe DIY General Instruction & Assembling Video- Click here)
Step 5: Stick from the Center
 Step 5: Stick from the Center
- Start applying the sticker from the center and gently smooth it outward.
- Use your fingers or a soft cloth to press firmly and remove any air pockets.
Step 6: Remove Bubbles
- If bubbles appear, no worries!
- Push towards the edge or lightly prick with a pin to flatten.
- Remember — be gentle to keep your design smooth and flawless.
Step 7: Enjoy Your Creation!
- Step back and admire your masterpiece!
- You’ve just turned a plain wall into a piece of art — all by yourself.

(StickMe DIY General Instruction & Assembling Video- Click here)
Don’t forget to share your StickMe setup with us and leave a review. Clink here Review terms to get your Surprise Reward
A Few Handy Tips from Team StickMe
 A Few Handy Tips from Team StickMe
- Stickers are for one-time use only — once removed, adhesion strength reduces.
- Avoid freshly painted surfaces — wait at least 2 weeks before application.
- Always use on smooth, even walls for the best grip.
- Peel off slowly when removing to avoid tearing or stretching.
Why StickMe Wall Stickers Are Loved by So Many
 Why StickMe Wall Stickers Are Loved by So Many
Our wall stickers are: Easy to apply – no tools, no mess. Designed to inspire creativity.
 Budget-friendly – a full makeover under minutes.
 Perfect for homes, offices, or even rental spaces.
Each product is printed with care and shipped in smaller pieces — making it easier to handle and fun to assemble. It’s like doing a mini art project for your wall!
StickMe — Design. Print. Personalize.
 StickMe — Design. Print. Personalize.
Explore our range of motivational quotes, nature-inspired, kids’ room, and festive designs on www.stickme.in.
For any questions or video guidance, our friendly team is just a message away: WhatsApp us at +91 80150 30012 (Mon–Sat, 10 AM–5 PM).
Bring your walls to life — the StickMe way 
Simple, Creative, and Super Satisfying!